Understanding how many people visit your website and what they do when they get there is important for everyone from the part-time blogger to the corporate CEO.
That's where Google Analytics comes into play - a robust, free tool that can help you understand the performance of your website.
This tutorial will help you create a new Google Analytics property using Google Tag Manager (GTM).
Step 1: Create New Property in Google Analytics
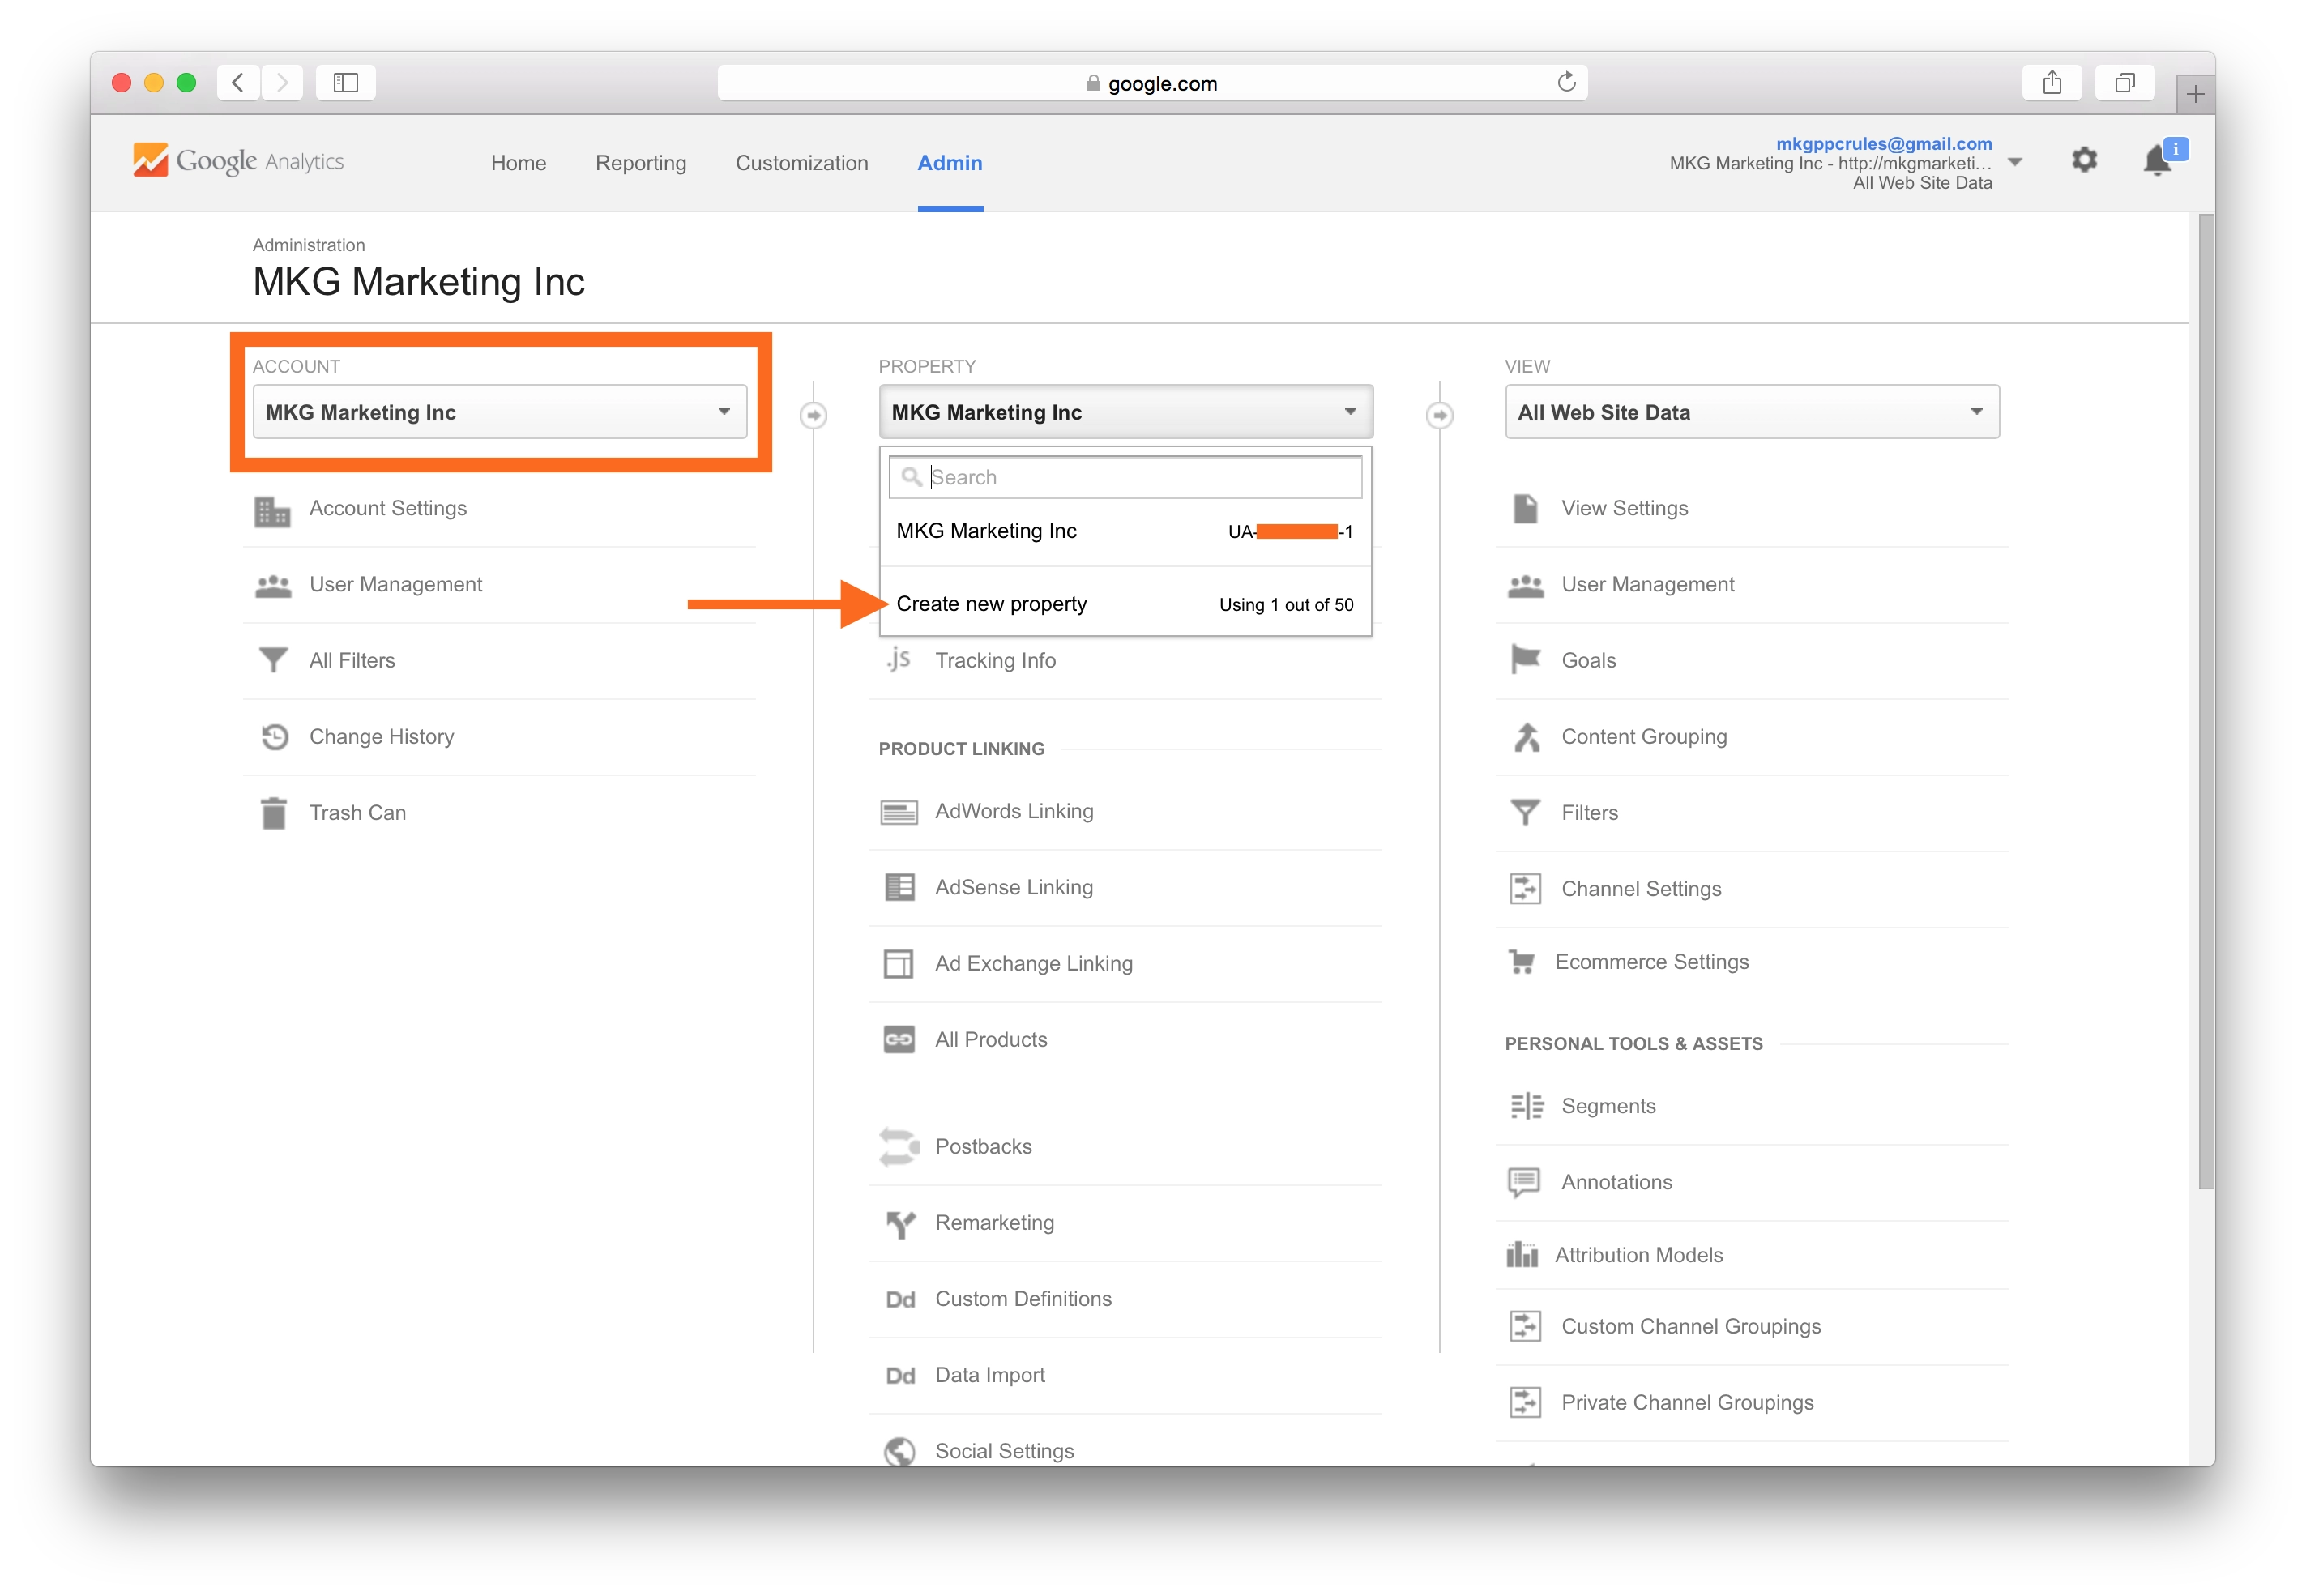
- Go to the Admin section of Google Analytics and ensure you are in the correct account.
- Click on Create New Property and complete the form for the new property.
- Make note of the new property Tracking ID - designated with UA.
Step 2: Create New Container in GTM
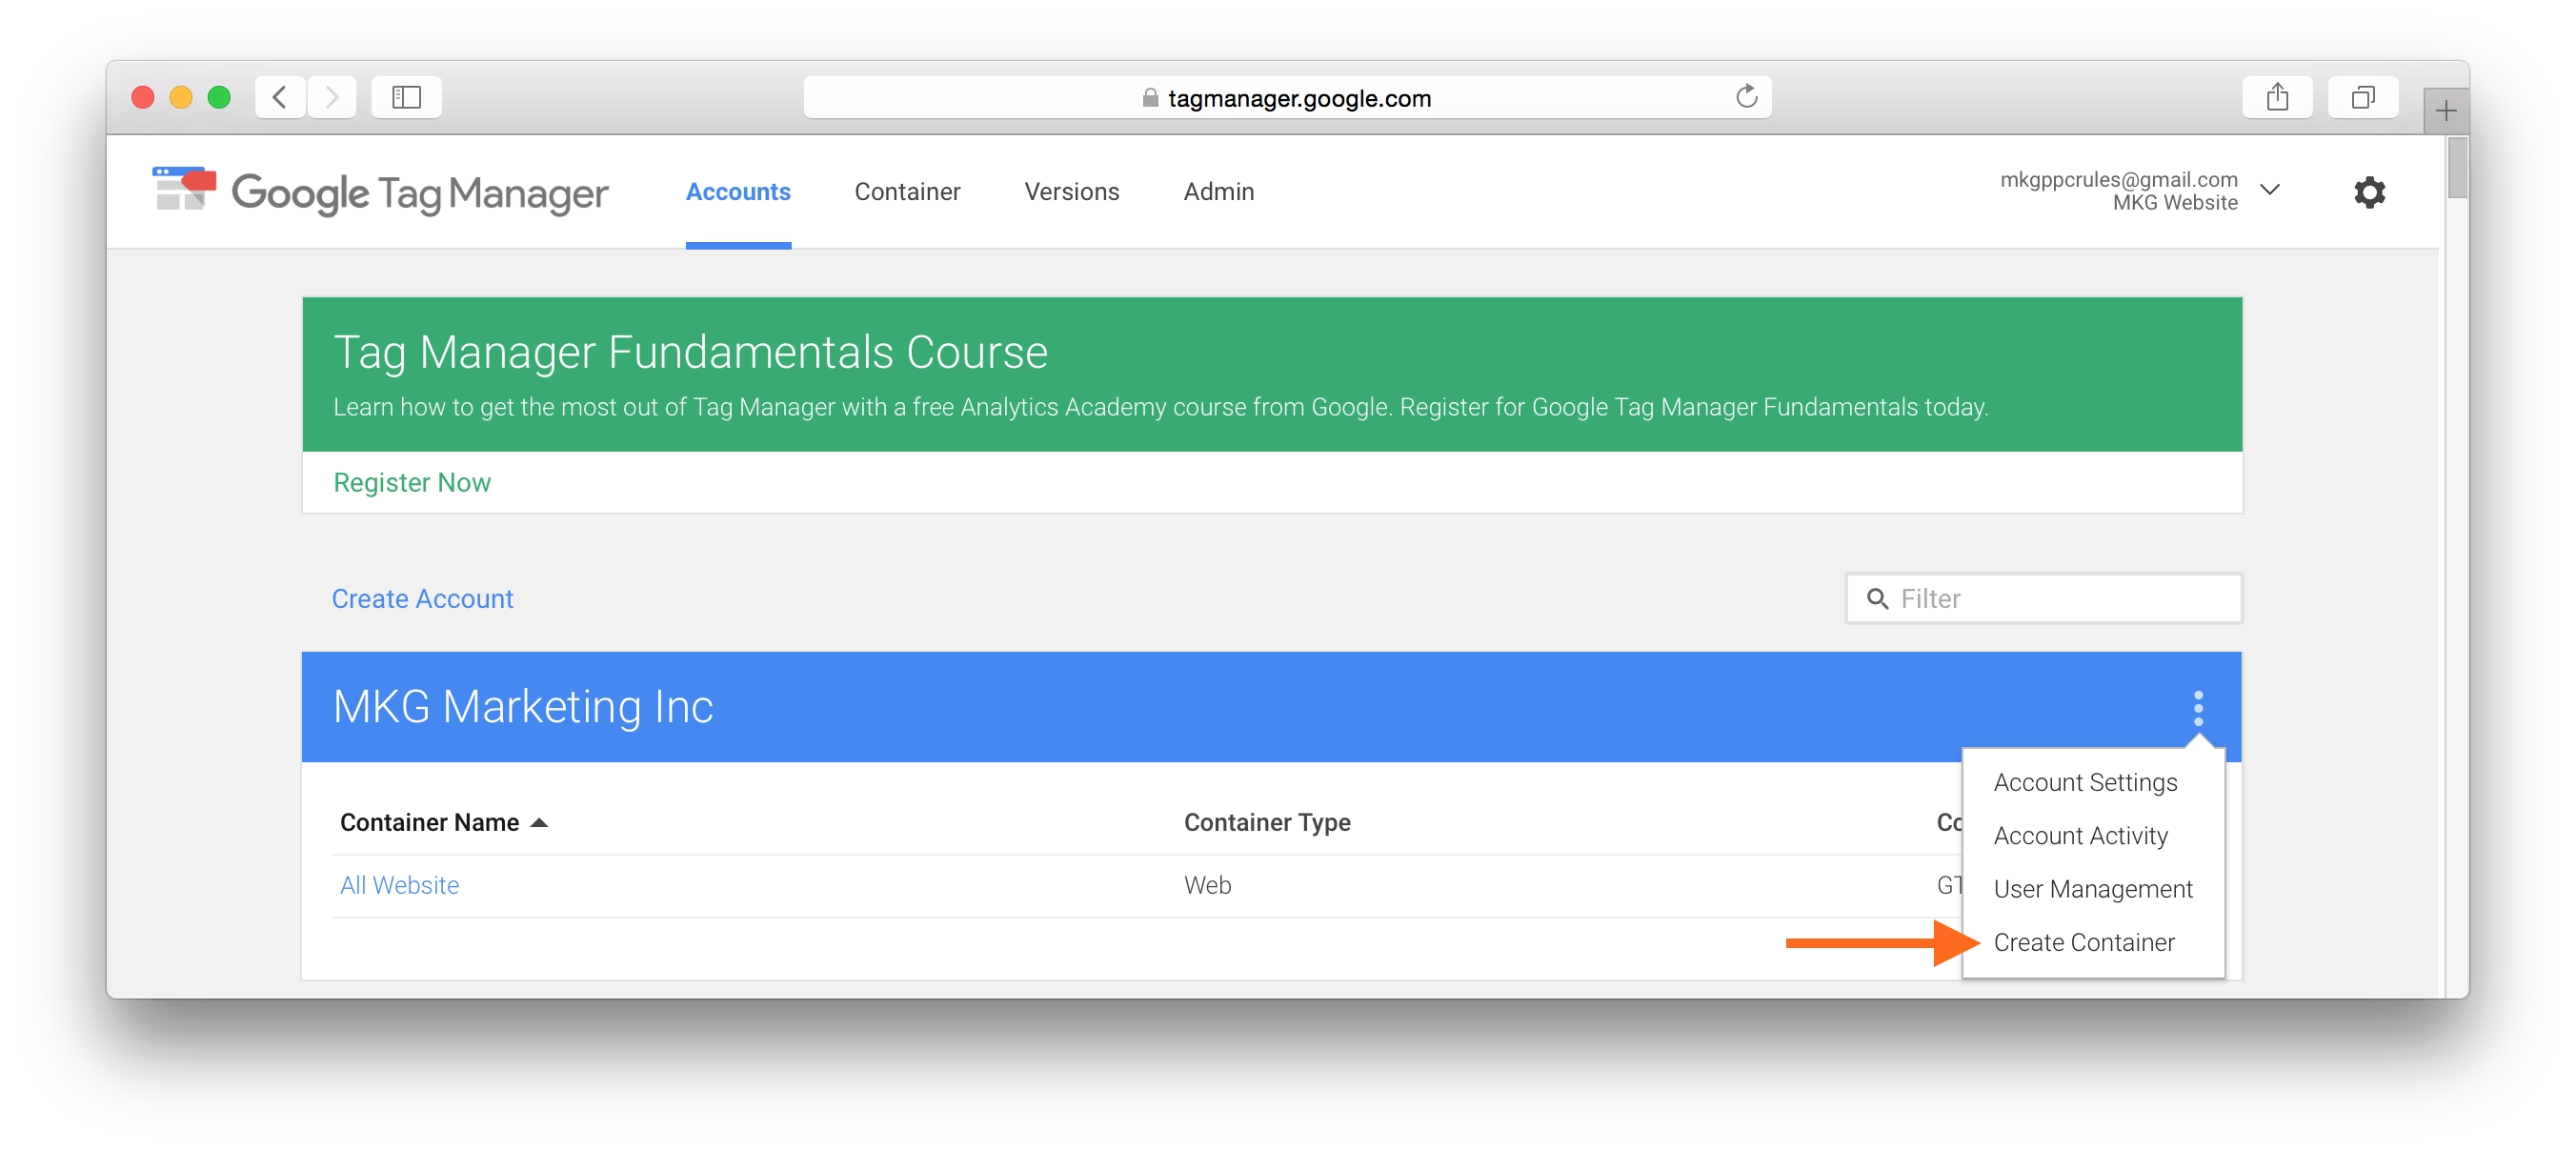
- Login to Google Tag Manager and scroll down to the correct account.
- Click on Create Container and complete the form for the new container.
- Click on the new container name to update the tags and rules for it.
Step 3: Place GTM Code on Website
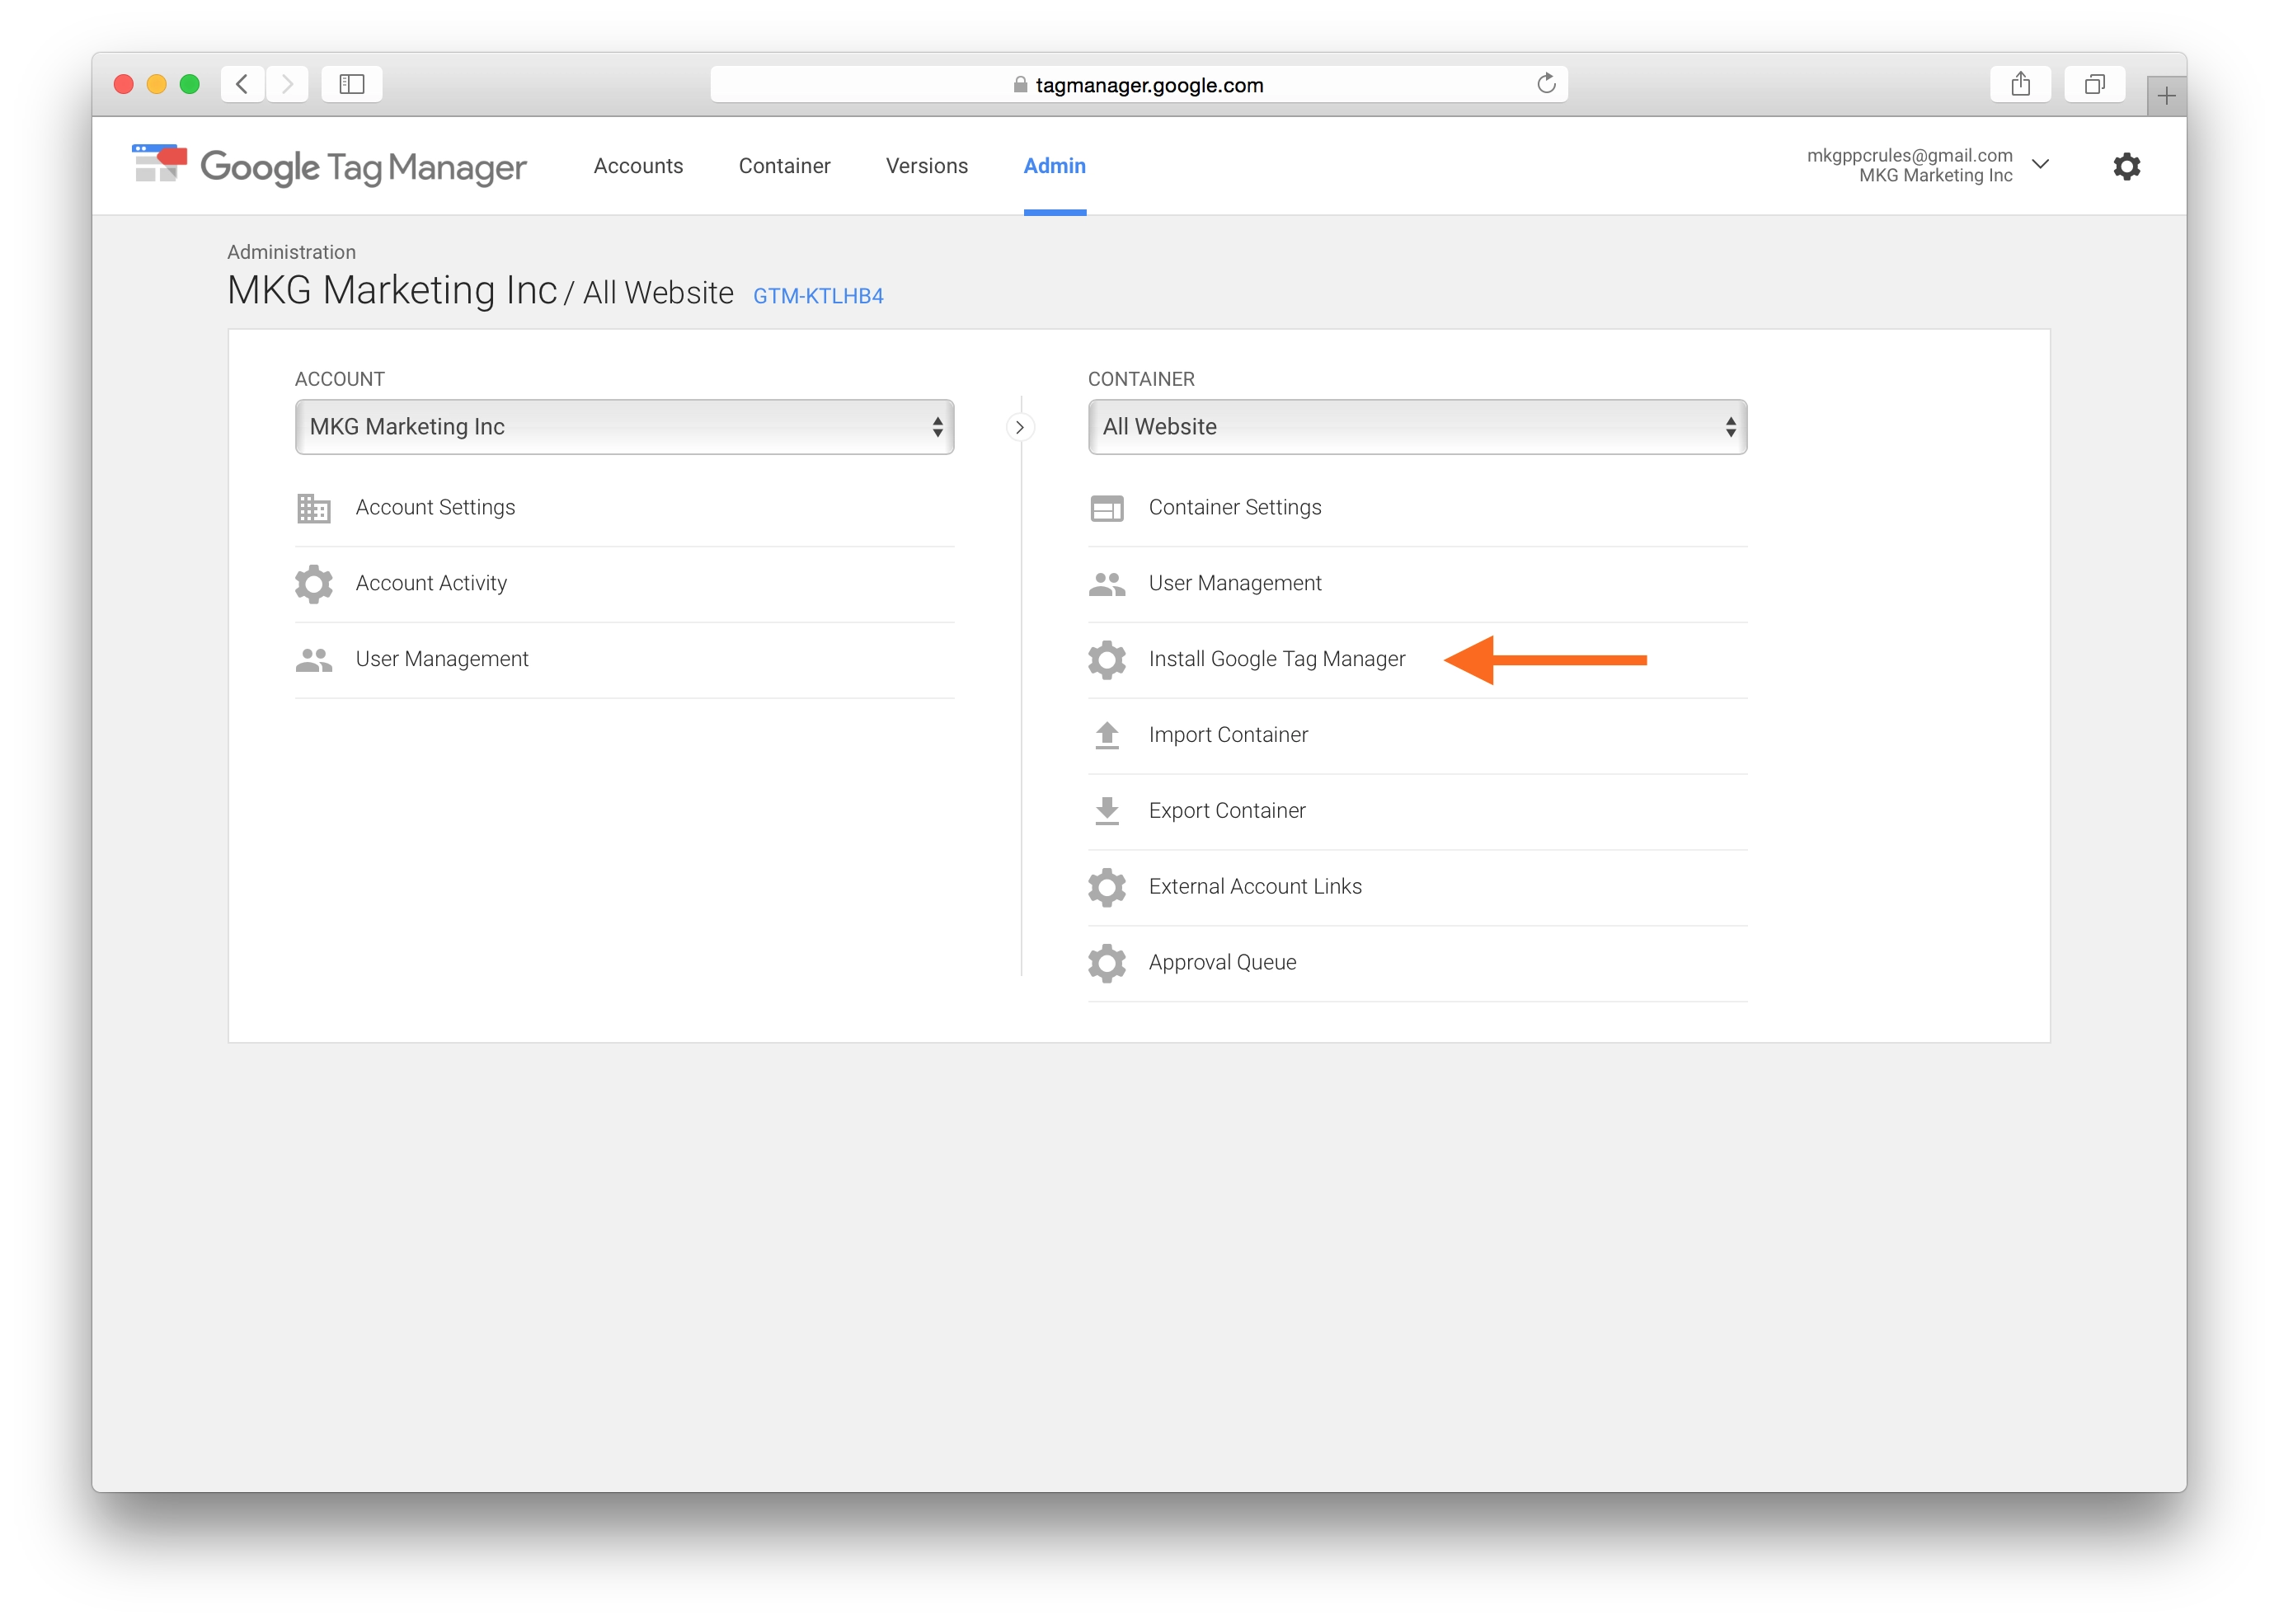
- In the Admin tab for your new container, click on Install Google tag Manager to get your GTM code.
- Copy the code and paste it on all pages of your website immediately following the opening tag. For more information on installing the GTM code, visit the GTM Quick Start Guide.
Step 4: Create a New Tag in GTM
- In the Container Overview, click on Add a New Tag.
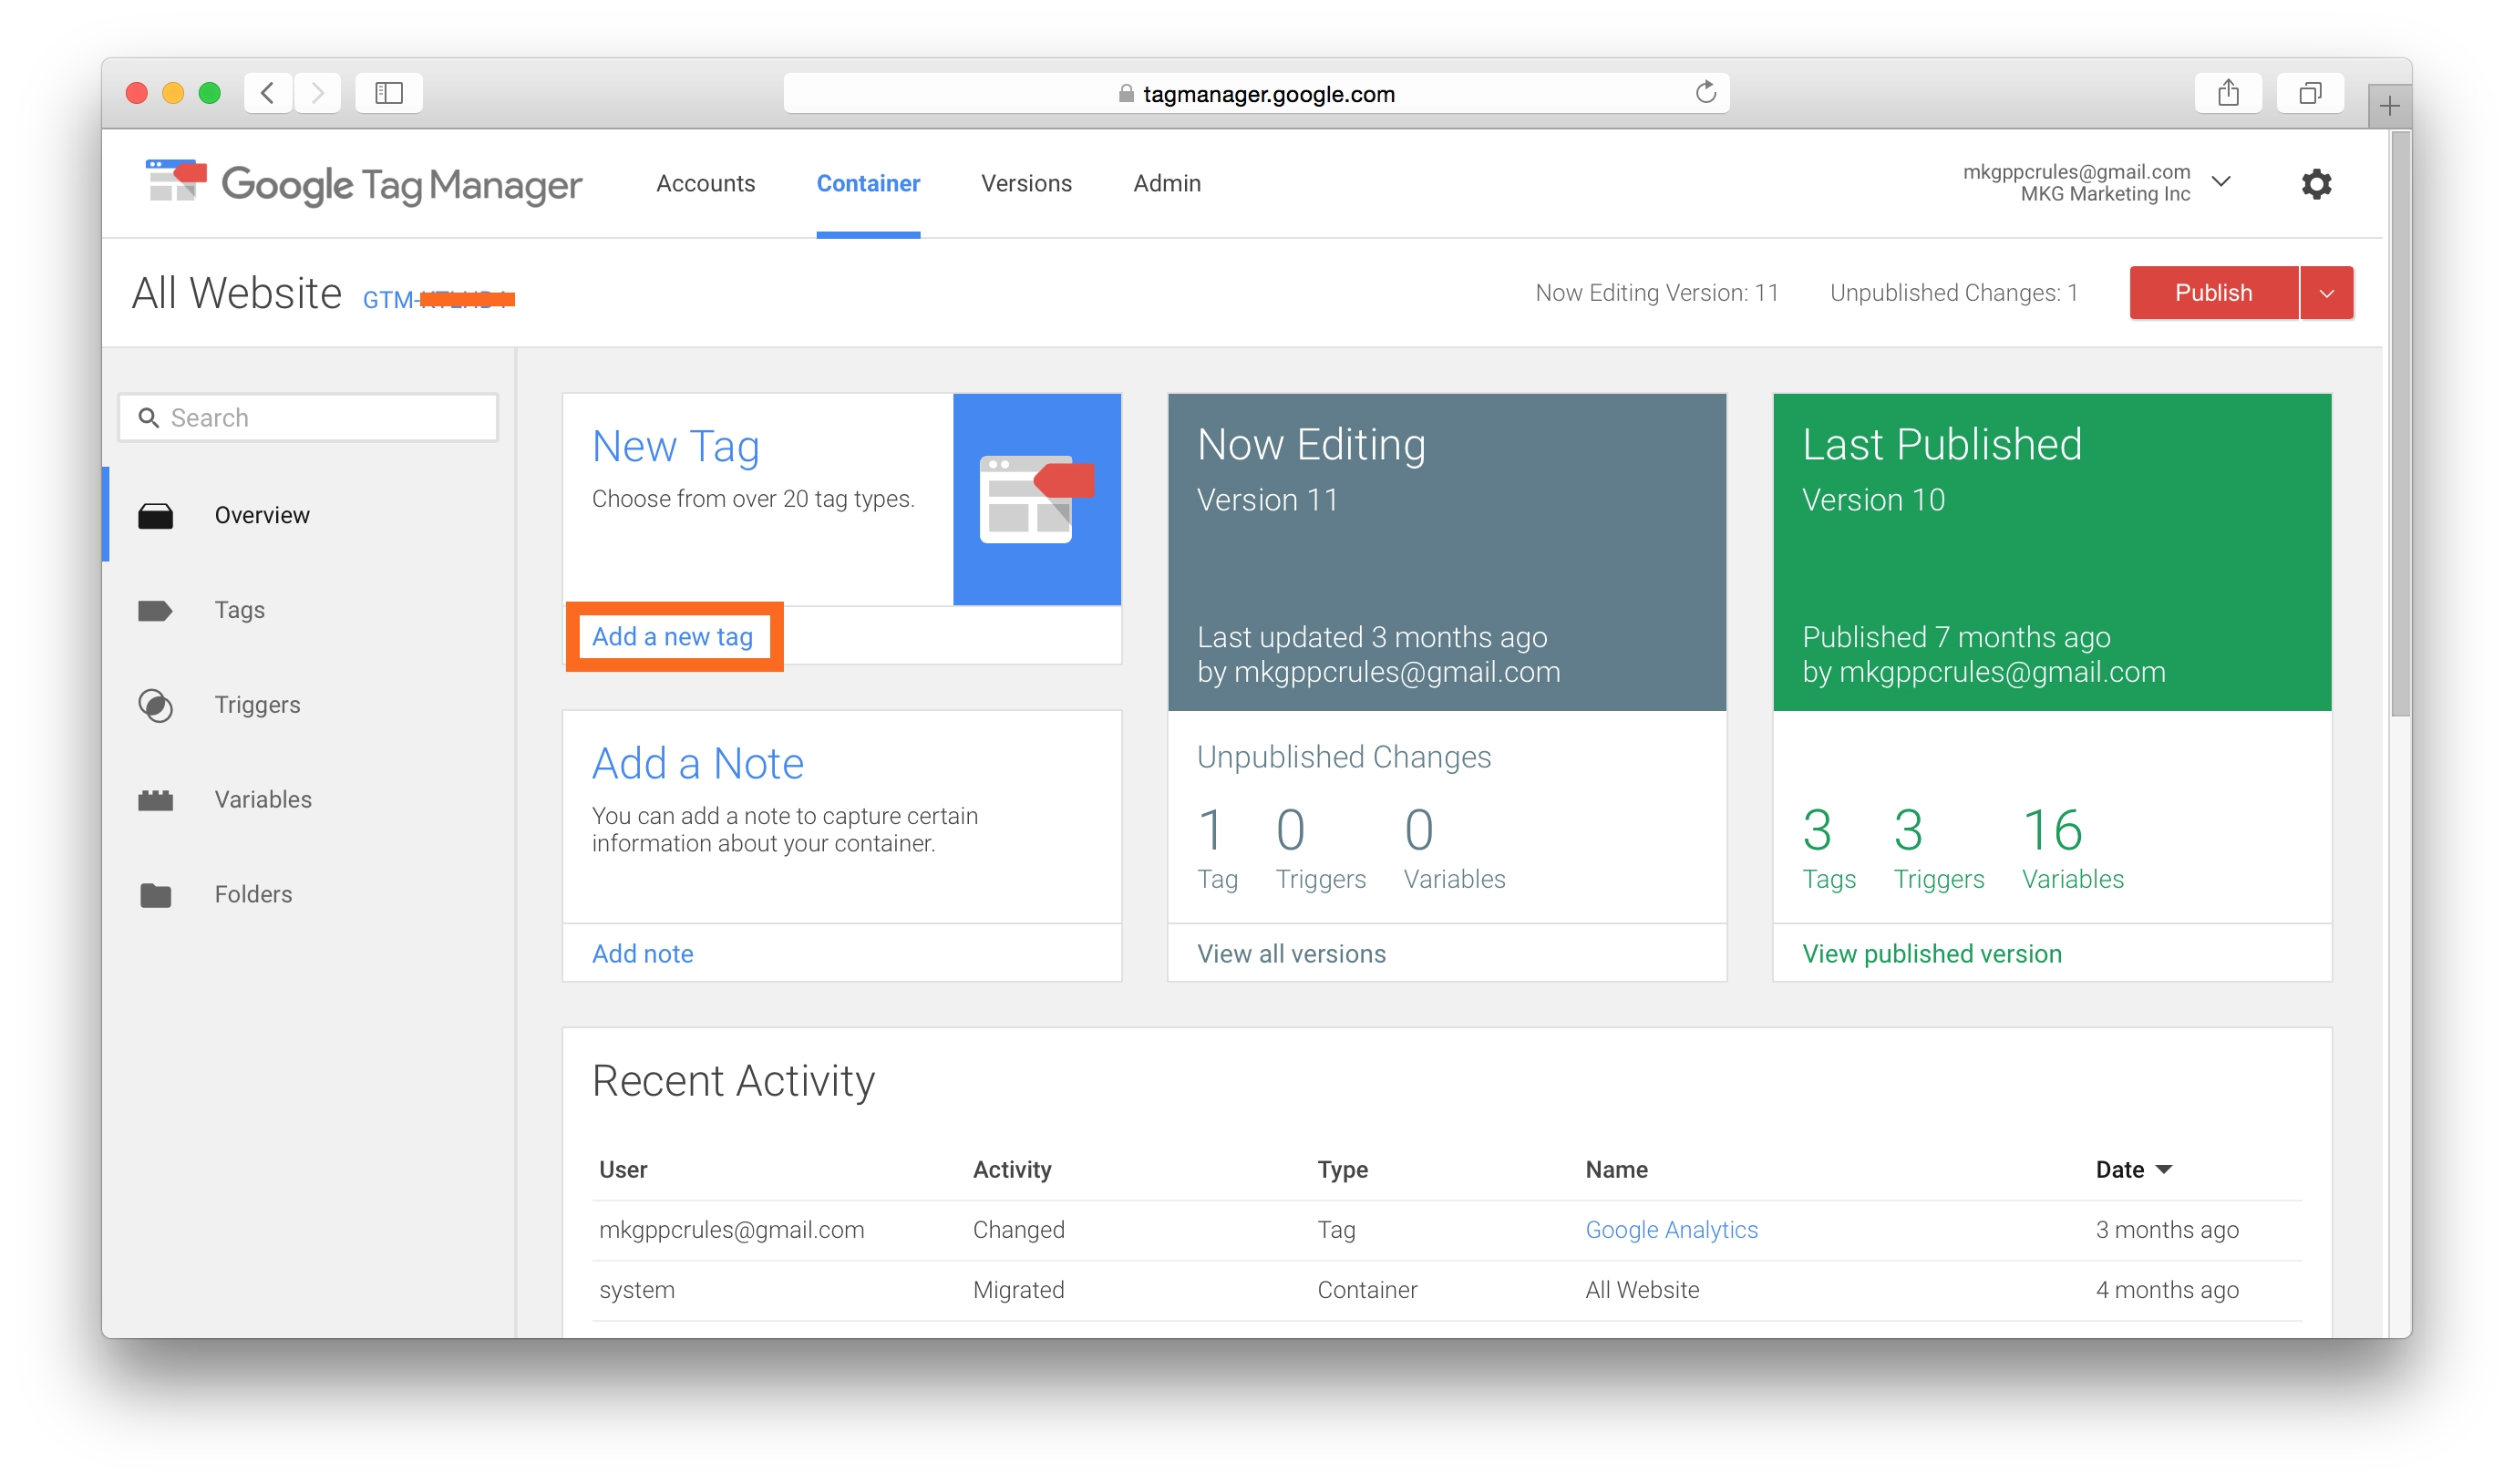
- Complete the form for Google Analytics > Universal Analytics with the GA Tracking ID from Step 1.
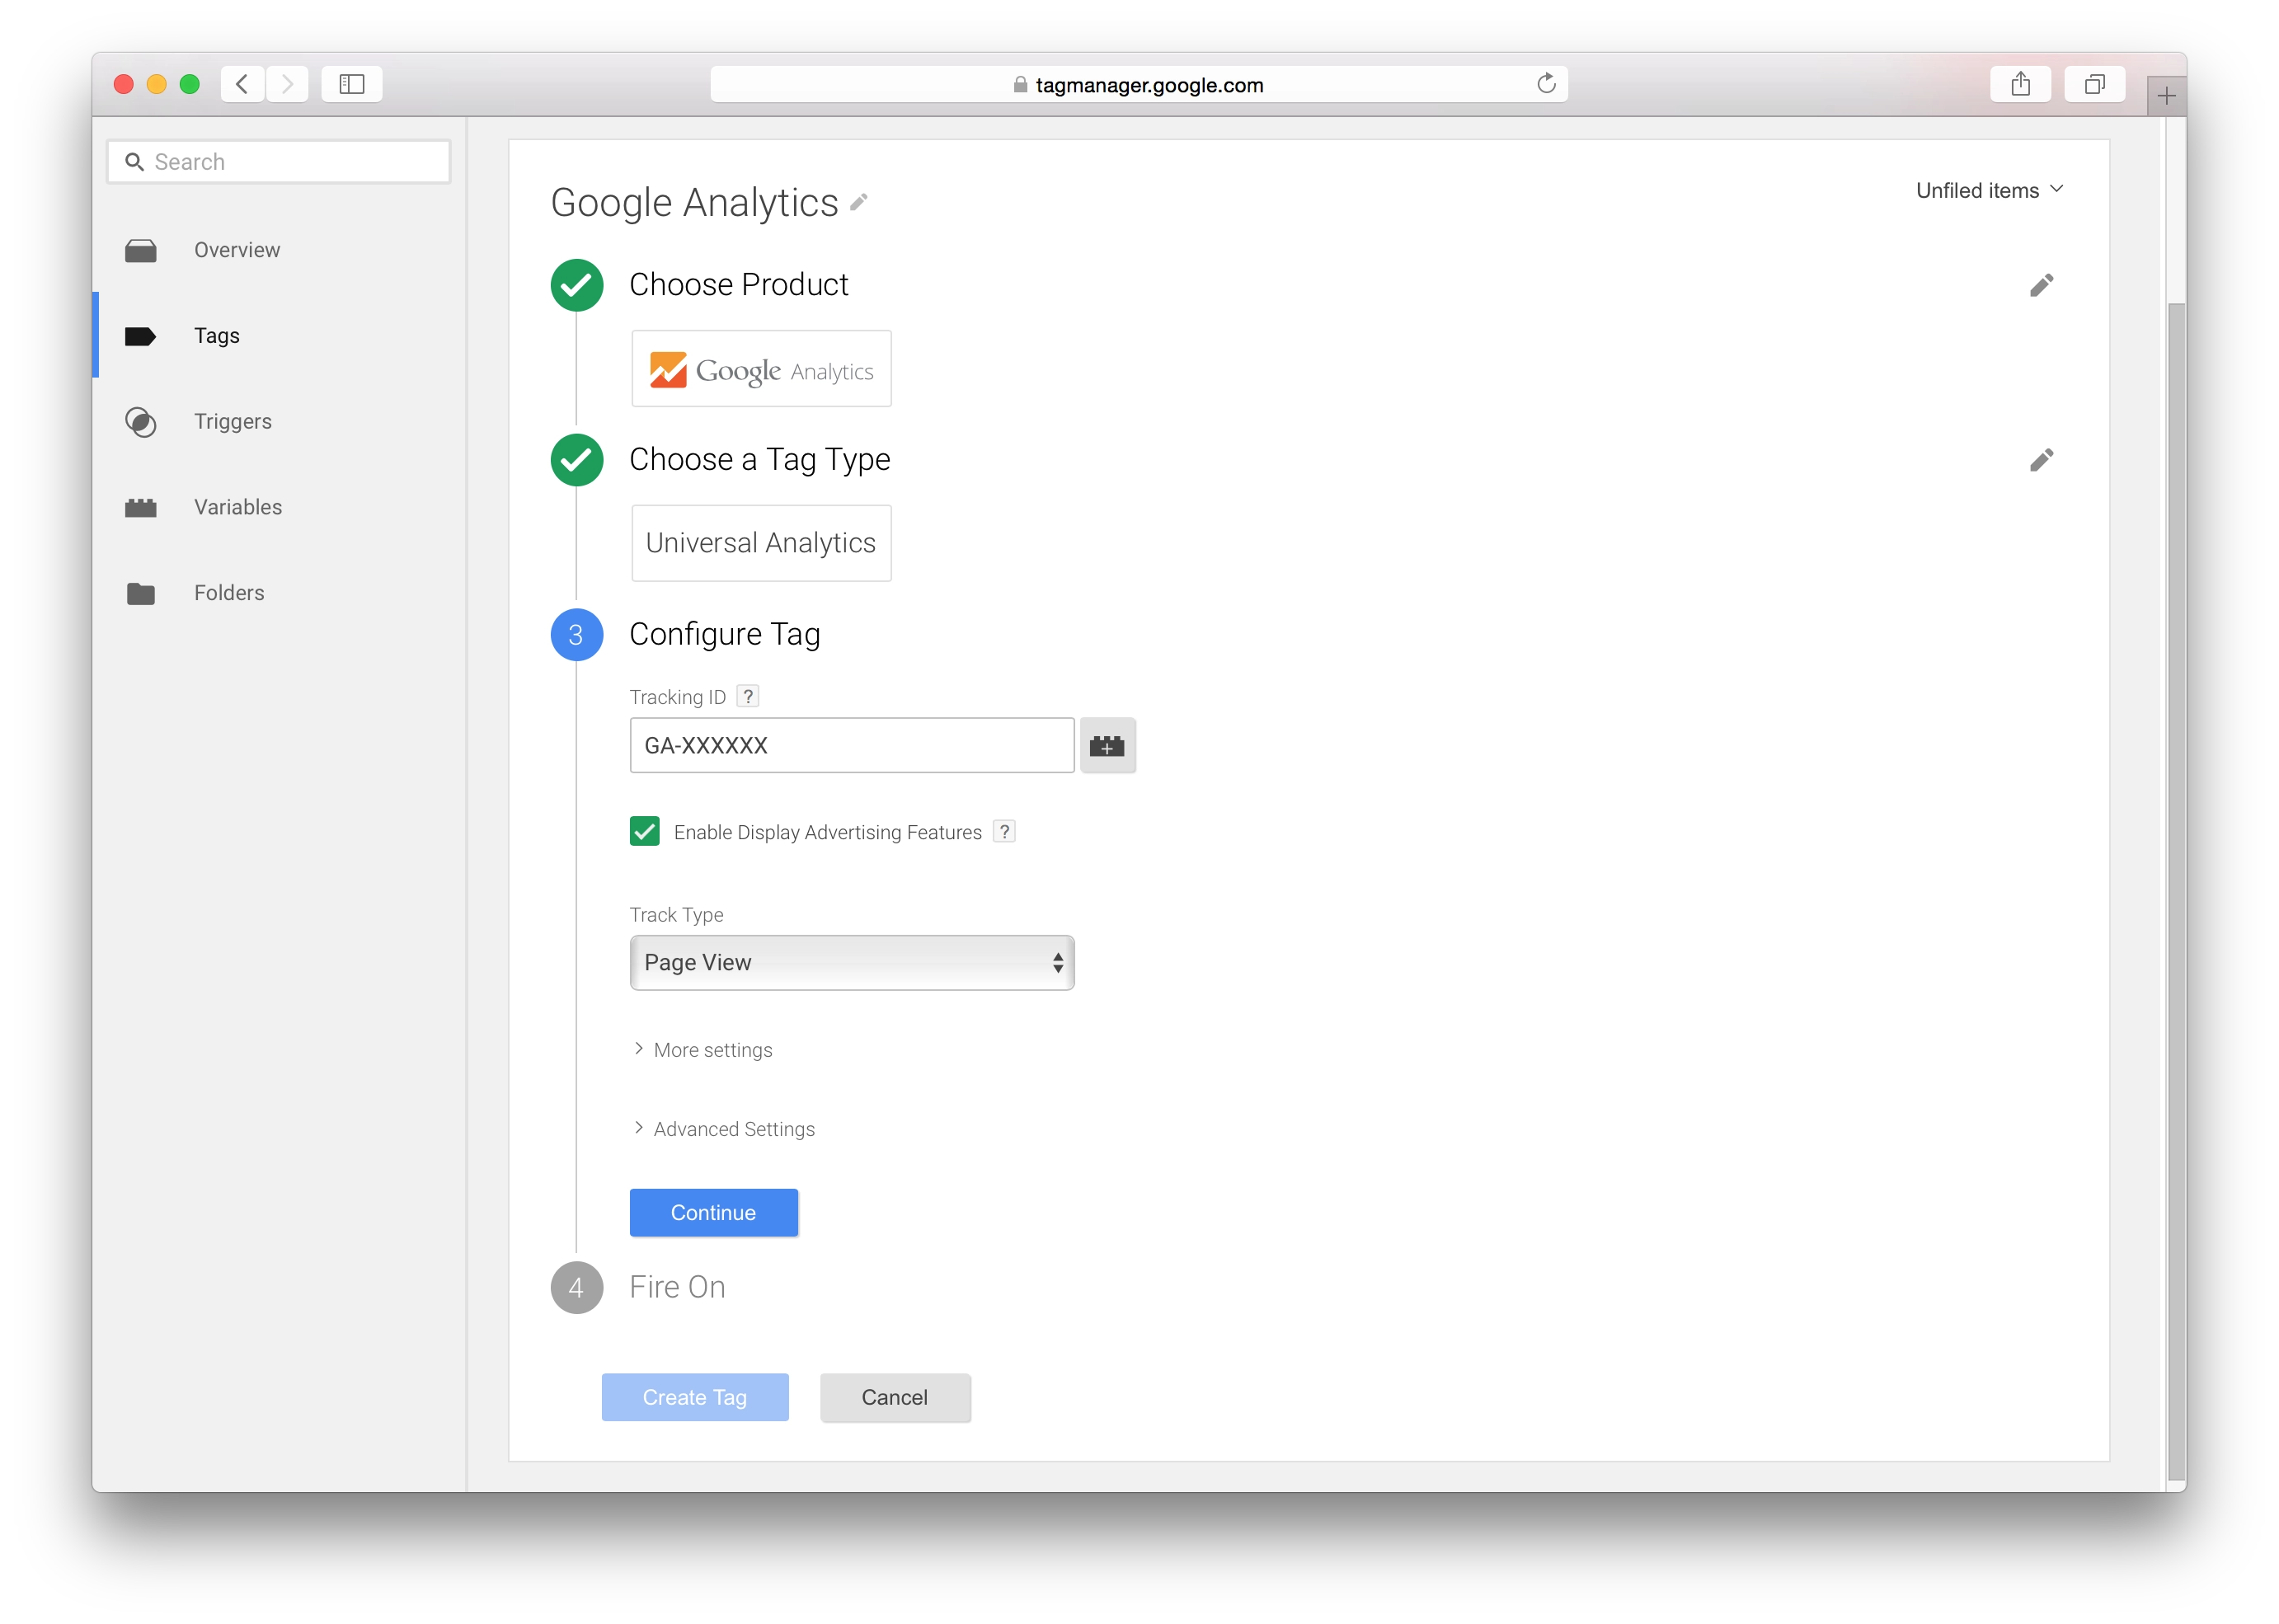
- Ensure the following settings are enabled
- Display Advertising Features
- Tracking Type is Pageview
- For part four of the form, Fire On, select All Pages and click on Create Tag.
Step 5: Publish Container
Once you have ensured the first four steps have been completed, click the red publish button in the top right corner of your Google Tag Manager account.